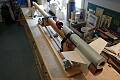
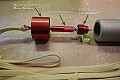
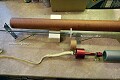
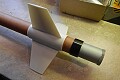
Firestorm54: Winter 2013-14


The GL Firestorm54, minimum <br />diameter rocket project... this airframe is designed to use a Pro54 motor casing which <br />fits inside the full diameter of the airframe, and held <br />in place by an internal motor retainer... the closure adapter is secured to the top of the motor, and the required extensions <br />attached so that when inserted into the motor casing, they reach the <br />threaded end of the motor retainer... this view shows the relative location of the motor casing and retainer prior to assembly <br />into the airframe. Epoxy is applied to the inside of the airframe at the location <br />of the retainer, and then the motor retainer is inserted into the airframe <br />using a threaded rod measured to the specified distance... similarly, a retention collar is pushed into the airframe from the other end so <br />that it rests directly on top of the retainer. The epoxied collar provides <br />additional strength to the retainer during thrust phase... the view from the aft end showing the motor retainer <br />epoxied into place, after insertion into the <br />airframe the required distance... this view from the forward end shows the top of the motor retainer,<br />with the green arrow showing the collar epoxied into place <br />directly above the motor retainer... the black Slimline casing retainer is then <br />epoxied to the back of the airframe... this view shows the black retainer, motor casing <br />and moulded fin-can in place... however, the fin-can must first be epoxied to the airframe up against <br />the black motor retainer. The airframe is coated with epoxy <br />and then the fin-can slid down into place... to reduce wind resistance caused by the 4mm leading edge of the fin-can, <br />a tapered section is created above it using layers of fiberglass <br />covered with hardened but sandable putty... the sanded tapered section, with some <br />fiberglass layers showing through... the next phase is attaching the coupler, which <br />doubles as the electronics bay... the attachment point for the quicklink... a second off-center rod is added which extends the full length of <br />the electronics bay. A terminal block is then secured to <br />the top and wires run through the bulkhead... the support rod which holds the altimeter <br />sled and the attached bulkheads... the top of the G10 fiberglass altimeter <br />sled with holes drilled... the mounted altimeter, a Featherweight Raven 3... the reverse side showing how the aluminum tube was fiberglassed <br />to the sled. Note the epoxied sections that were dremeled flat <br />to allow the nuts to sit flush with the base... even though the sled and electronics are very light, they <br />are mounted at the top of the av bay to keep <br />the CG as far forward as possible... side view of the altimeter showing clearance from sled. This also <br />shows the black capacitor prior to being secured to the board... the arrow points to the Aerogel ultracapacitor. To secure it for <br />high-G flights, a small amount of epoxy and fine fiberglass <br />cloth was used to secure it to the board... the sled is shock mounted on the all-thread rail between two plastic spacers, <br />secured with washers and nuts. This allows the sled to be firmly <br />held in place without excessive compression... the two rubber sleeves on the side of the sled allow for firm contact <br />with the inner wall of the AV bay and reduce vibration... connected to USB for ground testing... a rare earth magnet is brought close to the magnetic <br />switch to power on the altimeter... powering up... the interface software allows for full flight simulations to evaluate <br />multiple parameters including dual deployment capability... the lower test light indicates a successful <br />firing of the apogee charge... the aft light indicates a successful <br />firing of the main charge, ready for flight... the assembled rocket... this Pro54mm 6G motor casing could be used to hold <br />a "K" class motor, which simulation suggests <br />could reach an altitude over 10,000ft... however for the first flight, a 54-38mm adapter will be used with Pro38 6G casing<br /> and 4G Cesaroni "I" motor. The red delay/ejection adapter can be seen <br />just above the motor, attached to the extension which is secured <br />to the motor retainer prior to launch... ready to fly, on a tidier workbench.